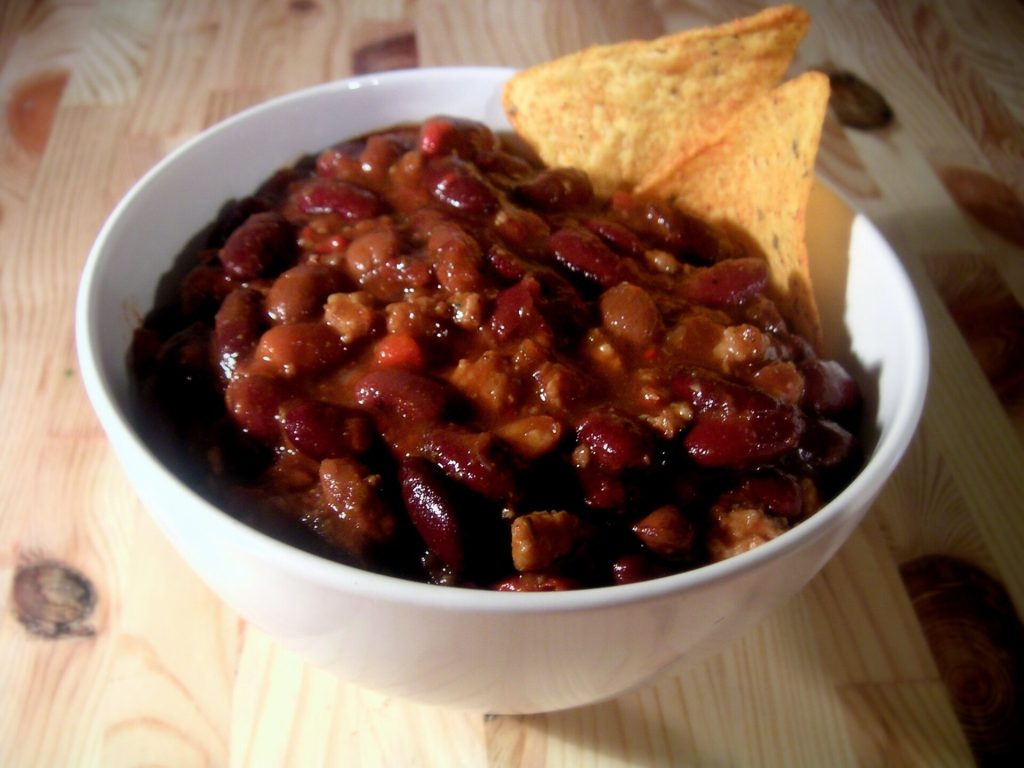
Great beef chili from scratch comes down to three things: a paste made from toasted dried chiles instead of a jar of chili powder, beef that is properly browned before any liquid goes in, and a long, lazy simmer over low heat. Do those well and the rest is seasoning. Cook ground beef to 160°F, and cool the leftovers quickly, and you have a pot that feeds you all week.
Chili powder has its place, but it tastes flat next to whole chiles you have toasted and blended yourself. The paste gives the pot a deep red colour, a gentle smoky sweetness and heat you can actually control.
This method makes about eight servings in a heavy Dutch oven. It works with beans or without them, and it freezes beautifully.
Key takeaways
- Toast dried chiles for seconds, not minutes; scorched chiles turn the whole pot bitter.
- Brown the beef in batches so it sears instead of steaming in its own juices.
- USDA says ground beef should reach 160°F on a food thermometer, since colour is not a reliable guide.
- Canned beans are precooked and safe as they are; dried red kidney beans need a proper boil first.
- Refrigerate leftovers within 2 hours in shallow containers and use within 3 to 4 days, or freeze.
In this guide
- What you need
- Step by step: making the chili
- Beans or no beans
- How long to simmer, and how to tell it’s ready
- Cooling, storing and freezing leftovers
- FAQ
- Your first pot this weekend
What you need
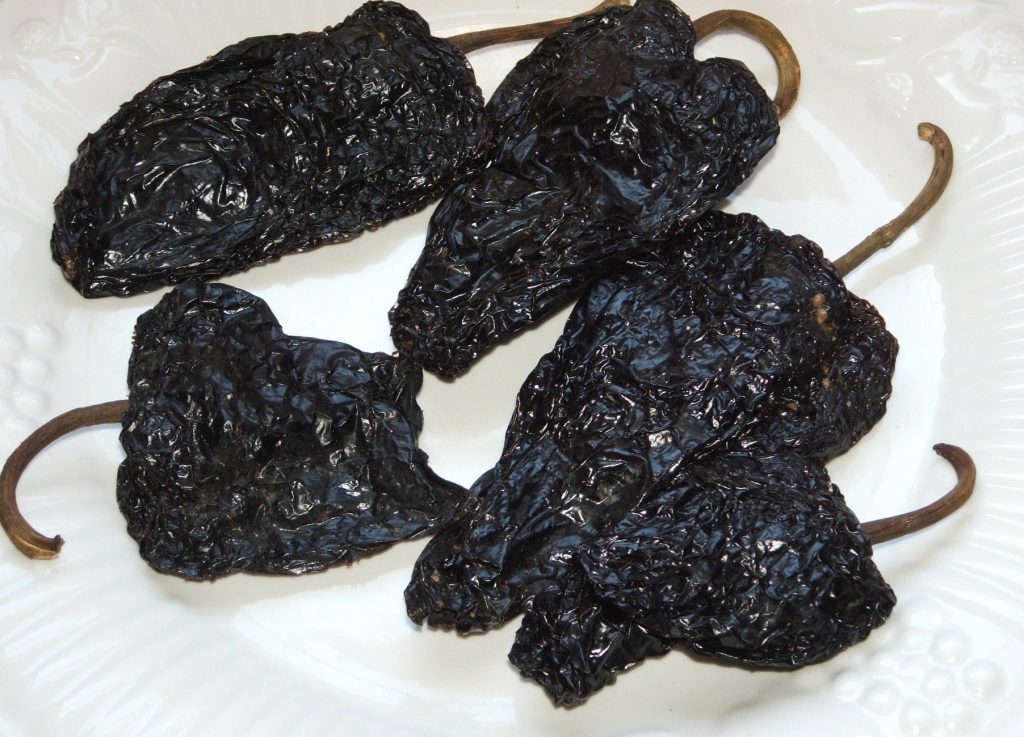
Dried chiles live in the Latin American aisle of most supermarkets. Pick ones that are still pliable, like a raisin, rather than brittle and dusty. A mix works best: one mild, fruity chile for body and one with a bit more bite.
For the chile paste
- 4 dried ancho chiles, for raisiny sweetness and colour
- 3 dried guajillo chiles, for a brighter, tangy red
- 1 to 2 dried chiles de árbol, optional, for extra heat
- 2 cups hot beef or chicken stock, for soaking
For the pot
- 2 1/2 lb ground beef (80/20 is ideal), or 2 lb beef chuck cut into small cubes
- 2 tbsp neutral oil
- 2 medium onions, diced
- 5 garlic cloves, minced
- 2 tsp ground cumin and 2 tsp dried oregano
- 2 tbsp tomato paste
- 1 can (14 oz) crushed tomatoes
- 2 cans (15 oz each) kidney or pinto beans, drained and rinsed, if using
- 1 to 2 cups extra stock or water
- Salt, a square of dark chocolate or 1 tsp brown sugar, and 1 tbsp cider vinegar to finish
You will also want a blender, a heavy pot with a lid and an instant-read thermometer. The thermometer is the one tool people skip, and it’s the one that tells you the beef is safe.
Step by step: making the chili
- Prep the chiles. Wipe them with a damp towel, snip off the stems and shake out most of the seeds. Tear the flesh into flat pieces so they sit evenly in the pan.
- Toast them briefly. Heat a dry skillet over medium heat and press the chile pieces flat for about 15 to 30 seconds a side, just until they smell toasty and soften slightly. If you see smoke or black spots, pull them off; a burnt chile tastes acrid and will carry through the whole pot.
- Soak and blend. Cover the toasted chiles with the hot stock and leave them for 20 to 30 minutes until soft. Blend chiles and soaking liquid until completely smooth. Push it through a sieve if your blender leaves flecks of skin.
- Brown the beef in batches. Heat the oil in the Dutch oven over medium-high heat. Add a third of the beef, spread it out and leave it alone for a few minutes so a dark crust forms before you break it up. Move each batch to a bowl and repeat. Crowding the pot makes the meat release liquid and grey rather than brown.
- Build the base. Lower the heat to medium, add the onions to the fat left in the pot and cook until soft and golden, about 8 minutes. Stir in the garlic, cumin, oregano and tomato paste and cook for a minute or two, until the paste darkens.
- Add the chile paste. Pour it in and let it fry and bubble for 3 to 4 minutes, stirring. Frying the paste in fat deepens its flavour and takes the raw edge off.
- Combine and simmer. Return the beef and its juices, add the crushed tomatoes and enough stock to just cover. Bring to a gentle bubble, then turn the heat to low, partly cover and simmer.
- Check the temperature. Before serving, take the temperature of the meat. The USDA’s ground beef guidance says to cook ground beef to 160°F as measured with a food thermometer, and notes that colour alone doesn’t tell you it is safe. After a long simmer it will be well above that, but checking takes five seconds.
- Finish and season. Stir in salt to taste, the chocolate or sugar to round out the chiles, and the vinegar to wake everything up. Taste again. Chili almost always needs more salt than you expect.
Chili powder gives you a colour. Whole toasted chiles give you a flavour.
Beans or no beans
This is the oldest argument in chili, and there is no wrong answer at home. Texas-style bowls skip beans and lean on beef and chiles; most home cooks outside Texas add them for body and to stretch the pot.
Using canned beans
Canned beans are the easy route. Drain and rinse them, then add them for the last 30 minutes so they warm through and absorb flavour without turning to mush. According to University of Illinois Extension, canned kidney beans are safe to use without further boiling because they are precooked before processing.
Using dried beans
Dried beans give a better texture, but red kidney beans need care. The same Illinois Extension guidance advises soaking dried kidney beans for at least 5 hours, discarding the water, and boiling them briskly in fresh water for 30 minutes before using them. It also warns that slow cookers may not get hot enough to destroy the natural toxin in undercooked kidney beans, so never drop soaked raw kidney beans straight into a slow cooker chili.
Going bean-free
Skip them entirely and use a little more beef, or swap half the ground beef for cubed chuck. Chuck needs a longer simmer to turn tender, but it gives you satisfying chunks in every spoonful.
How long to simmer, and how to tell it’s ready
Ground beef chili is edible after 45 minutes, but it becomes something better after about 1 1/2 to 2 hours on low heat. That time lets the chile paste mellow, the fat render and rise, and the liquid reduce to a thick, spoon-coating stew. Cubed chuck needs longer, often 2 1/2 to 3 hours, until a piece breaks apart under a spoon.
- Keep it at a lazy bubble. A hard boil toughens the meat and can catch on the bottom of the pot.
- Stir every 15 to 20 minutes and scrape the base, adding a splash of stock if it gets too thick.
- Skim if you like. A layer of orange fat on top is normal; spoon some off or stir it back in for richness.
- Look for the signs. It’s ready when the sauce clings to a spoon, the colour has turned from bright to brick red, and the beef tastes seasoned all the way through.
Chili is famously better the next day, which makes it a natural make-ahead meal. For more ideas on building flavour in a pot, see our guide to slow-cooked stews, or browse more home-cooking recipes.
Cooling, storing and freezing leftovers
A big pot of chili stays hot for a long time, which is exactly the problem when you want to store it. The USDA’s leftovers guidance says leftovers must be refrigerated within 2 hours of cooking, and recommends dividing large amounts into shallow containers so they cool faster. It singles out a big pot of soup as something that takes a long time to cool, and chili behaves the same way.
| Stage | What to do | USDA timing |
|---|---|---|
| Cooling | Portion into shallow containers, lids off until steam stops | Refrigerate within 2 hours |
| Fridge | Store covered | Use within 3 to 4 days |
| Freezer | Leave headroom in containers or freeze flat in bags | Best quality within 3 to 4 months |
| Thawing | Fridge overnight, cold water, or microwave | Cook cold-water-thawed food before refreezing |
| Reheating | Stir well, cover to keep it moist | Reheat to 165°F; bring sauces and soups to a rolling boil |
Frozen leftovers stay safe indefinitely, the USDA notes, but quality drops over time, so label each container with the date. Freeze some in single portions for quick lunches and the rest in family-size tubs.
FAQ
Can I use chili powder instead of dried chiles?
Yes. Use about 3 to 4 tablespoons of a good pure chile powder and bloom it in the fat with the cumin. The result will be good, just less deep and less smoky than the whole-chile version.
How do I make chili less spicy?
Leave out the chiles de árbol, remove every seed and vein from the anchos and guajillos, and add more beans or tomatoes. A spoonful of sour cream on top also tames the heat.
What temperature should ground beef reach in chili?
The USDA says 160°F, measured with a food thermometer. A long simmer gets it there easily, but a quick check confirms it.
Can I make this in a slow cooker?
Brown the beef and fry the chile paste on the stove first, then transfer everything to the slow cooker on low for 6 to 8 hours. Use canned beans rather than soaked raw kidney beans.
Your first pot this weekend
Buy a small bag each of anchos and guajillos this week and try toasting a few chiles, even before you commit to a full pot; the smell alone will convince you. Then make a batch on a slow Sunday and freeze half. Round out the meal with our skillet cornbread, and pick up more practical techniques in our cooking tips section.
Featured photo: Bowl of chili by Carstor, BY-SA 2.5.